1. 最新の投稿をサイドバーに表示
閲覧者が検索エンジン等でページにたどり着いた時、次にリンクを辿る可能性が高くなります。
sidebar.phpに記述
1 2 3 4 5 6 | <?php query_posts('showposts=4'); ?> <ul> <?php while (have_posts()) : the_post(); ?> <li><a href="<?php the_permalink() ?>"><?php the_title(); ?></a></li> <?php endwhile; ?> </ul> |
2. SEOの為にタイトルをよりわかりやすく
タイトルにカテゴリ、投稿者、日付などを入れる事によりSEOが飛躍的にあがります。
一般的にSEOで一番重要なのはtitleと言われています。あなたのテーマのタイトルをカスタマイズしましょう。下記は一例です。
ページにあわせて記述
1 2 3 4 5 6 7 8 9 10 | <?php if ( is_home() ) { ?><? bloginfo('name'); ?> | <?php bloginfo('description'); ?><?php } ?> <?php if ( is_search() ) { ?>Search Results for <?php /* Search Count */ $allsearch = &new WP_Query("s=$s&showposts=-1"); $key = wp_specialchars($s, 1); $count = $allsearch->post_count; _e(''); echo $key; _e(' — '); echo $count . ' '; _e('articles'); wp_reset_query(); ?><?php } ?> <?php if ( is_404() ) { ?><? bloginfo('name'); ?> | 404 Nothing Found<?php } ?> <?php if ( is_author() ) { ?><? bloginfo('name'); ?> | Author Archives<?php } ?> <?php if ( is_single() ) { ?><?php wp_title(''); ?> | <?php $category = get_the_category(); echo $category[0]->cat_name; | <? bloginfo('name'); ?><?php } ?> <?php if ( is_page() ) { ?><? bloginfo('name'); ?> | <?php $category = get_the_category(); echo $category[0]->cat_name; ?>|<?php wp_title(''); ?><?php } ?> <?php if ( is_category() ) { ?><?php single_cat_title(); ?> | <?php $category = get_the_category(); echo $category[0]->category_description; ?> | <? bloginfo('name'); ?><?php } ?> <?php if ( is_month() ) { ?><? bloginfo('name'); ?> | Archive | <?php the_time('F, Y'); ?><?php } ?> <?php if ( is_day() ) { ?><? bloginfo('name'); ?> | Archive | <?php the_time('F j, Y'); ?><?php } ?> <?php if (function_exists('is_tag')) { if ( is_tag() ) { ?><?php single_tag_title("", true); } } ?> | <? bloginfo('name'); ?> |
3. デフォルトのGravatarを変更
あなたの作ったテーマをより目立たせる事が出来るでしょう。アバターはユーザーの自己表現手法でもあります。
functions.phpに記述
1 2 3 4 5 6 7 8 9 | <?php if ( !function_exists('fb_addgravatar') ) { function fb_addgravatar( $avatar_defaults ) { $myavatar = get_bloginfo('template_directory').'/gravatar.gif'; //default avatar $avatar_defaults[$myavatar] = 'Exciting new gravtar'; return $avatar_defaults; } add_filter( 'avatar_defaults', 'fb_addgravatar' ); } |
4. 関連記事を表示
閲覧者が検索エンジン等でページにたどり着いた時、次にリンクを辿る可能性が高くなります。
それが関連する投稿であればその確率がより高くなります。
表示箇所に記述
1 2 3 4 5 6 7 8 9 10 11 12 13 14 15 16 17 18 19 | <!-- this displays related posts, based on tags. If there are no tags, then it'll disappear. Magic!--> <?php if( function_exists('the_tags') ) //for use in the loop, list 5 post titles related to first tag on current post $tags = wp_get_post_tags($post->ID); if ($tags) { echo '<h2>Related Posts</h2> '; $first_tag = $tags[0]->term_id; $args=array( 'tag__in' => array($first_tag), 'post__not_in' => array($post->ID), 'showposts'=>5, 'caller_get_posts'=>1 ); $my_query = new WP_Query($args); if( $my_query->have_posts() ) { while ($my_query->have_posts()) : $my_query->the_post(); ?> <ul> <li><a href="<?php the_permalink() ?>" rel="bookmark" title="Permanent Link to <?php the_title_attribute(); ?>"><?php the_title(); ?></a></li></ul> <?php endwhile; }}?> |
5. ログインボタンはログインしていユーザーのみに表示
セキュリティー上当たり前ですが、一般の閲覧者にログインボタンは意味がありません。意味の持たないもの排除すべきです。
1 | <?php if (is_user_logged_in()) { ?><a class="hoverBtn" href="<?php echo get_option('home'); ?>/wp-admin/">Login</a><?php } ?> |
6. Twitterサポート
Twitterはコミュケーションをはかる際とても大きななウエイト占めています。Twitterと連携をする事で、あなたのサイトを宣伝してもらえるかもしれません。
functions.phpに記述
Tiny URLを使用する機能
1 2 3 4 | function getTinyUrl($url) { $tinyurl = file_get_contents("http://tinyurl.com/api-create.php?url=".$url); return $tinyurl; } |
twitterにURLを送るリンクを貼付けます。
1 2 3 4 | <?php $turl = getTinyUrl(get_permalink($post->ID)); echo 'Share on Twitter: <a href="http://twitter.com/home?status=Reading this - .$turl." title="Send a link to this article on Twitter" target="_blank">Send a link to this on Twitter</a>' ?> |
最後にあなたのつぶやきを表示する機能になります。
1 2 3 4 5 6 7 8 9 10 11 12 13 14 15 16 17 18 19 20 21 22 23 24 25 26 | <?php // Your twitter username. $username = "TwitterUsername"; // Prefix - some text you want displayed before your latest tweet. // (HTML is OK, but be sure to escape quotes with backslashes: for example href=\"link.html\") $prefix = "<h2>My last Tweet</h2>"; // Suffix - some text you want display after your latest tweet. (Same rules as the prefix.) $suffix = ""; $feed = "http://search.twitter.com/search.atom?q=from:" . $username . "&rpp=1"; function parse_feed($feed) { $stepOne = explode("<content type=\"html\">", $feed); $stepTwo = explode("</content>", $stepOne[1]); $tweet = $stepTwo[0]; $tweet = str_replace("<", "<", $tweet); $tweet = str_replace(">", ">", $tweet); return $tweet; } $twitterFeed = file_get_contents($feed); echo stripslashes($prefix) . parse_feed($twitterFeed) . stripslashes($suffix); ?> |
7. イメージのオートリサイズ&ショートコード
まずphpthumbを/THEMEURL/phpthumb/phpThumb.phpに配置。下記コードは幅を590pxに統一しています。
functions.phpに記述
1 2 3 4 | function imageresizer( $atts, $content = null ) { return '<img src="/THEMEURL/phpthumb/phpThumb.php?src=' . $content . '&w=590" alt="">'; } add_shortcode('img', 'imageresizer'); |
下記のようなショートコードを記述し表示します。
1 | [img]IMAGE URL[/img] |
8. ホームページの画像をカスタムフィードを使わずに取得
1 2 3 4 5 6 7 8 9 10 11 12 13 14 15 | // Get URL of first image in a post function catch_that_image() { global $post, $posts; $first_img = ''; ob_start(); ob_end_clean(); $output = preg_match_all('/<img.+src=[\'"]([^\'"]+)[\'"].*>/i', $post->post_content, $matches); $first_img = $matches [1] [0]; // no image found display default image instead if(empty($first_img)){ $first_img = "/images/default.jpg"; } return $first_img; } |
そして画像を幅200pxにリサイズ
1 | <img src="<?php bloginfo('template_url'); ?>/phpthumb/phpThumb.php?src=<?php echo catch_that_image() ?>&w=200" alt=""/> |
9. 検索にオートコンプリード機能をつける
1 | Search Result for <?php /* Search Count */ $allsearch = &new WP_Query("s=$s&showposts=-1"); $key = wp_specialchars($s, 1); $count = $allsearch->post_count; _e(''); _e('<span class="search-terms">'); echo $key; _e('</span>'); _e(' — '); echo $count . ' '; _e('articles'); wp_reset_query(); ?> |
jQuery.comとBassistance.deからjavascriptファイルを取得し、テーマフォルダの中に入れます。
下記コードは header.phpに記述します。
1 2 3 | <script type="text/javascript" src="<?php bloginfo('template_url'); ?>/jquery.js"></script> <script type="text/javascript" src="<?php bloginfo('template_url'); ?>/jquery.autocomplete.pack.js"></script> <link rel="stylesheet" type="text/css" href="<?php bloginfo('template_url'); ?>/jquery.autocomplete.css" media="screen" /> |
1 2 3 4 5 6 7 8 | <script type="text/javascript" src="<?PHP bloginfo('template_url'); ?>/jquery.autocomplete.pack.js"></script> <link rel="stylesheet" type="text/css" href="<?php bloginfo('template_url'); ?>/jquery.autocomplete.css" media="screen" /> <script type="text/javascript"> $(document).ready(function(){ var data = '<?php global $wpdb; $search_tags = $wpdb->get_results("SELECT name FROM $wpdb->terms"); foreach ($search_tags as $mytag){ echo $mytag->name. " "; } ?>'.split(" "); $("#ID_OF_SEARCH_INPUT_BOX").autocomplete(data); }) </script> |
10. iPhoneもサポートしましょう。
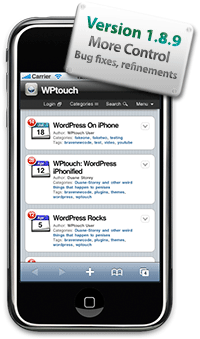
via 10 tricks to make your WordPress theme stand out
Recent Comments